
Feeling nervous about installing your first motherboard? You’re not alone. Many DIY enthusiasts worry about static damage, bent pins, or just getting it wrong. This step-by-step guide is designed to take you from unboxing to first boot with absolute confidence. Brought to you by Uniwin-Global, experts in industrial motherboards and smart system solutions for IoT devices.
Pre-Installation Preparation
Installation of a motherboard can be daunting to novices, but it can be an easy-to-manage process with proper preparation and step-by-step guides. Based on rich product and engineering expertise, as a new IOT smart device solutions provider committed to providing customers with industrial motherboards and smart system solutions, Uniwin-Global understands the importance of proper installation processes.
Prepare Tools and Materials Needed
Before you actually begin installing your motherboard, ensure you have all the equipment and components handy. You will require a Phillips head screwdriver, an anti-static wrist strap, standoffs for the motherboard, screws, and your chosen motherboard. Uniwin-Global deals with Android & Linux motherboards, hardware & software solutions for SIP intercom items, with a one-stop solution for your project needs.
Ensure Safety and Anti-Static Measures
Static electricity will damage sensitive electronic parts. Always work with an anti-static wrist strap and on a hard table. Touch a grounded metal surface before handling components to remove static charge.
Identify Your Uniwin-Global Motherboard Model
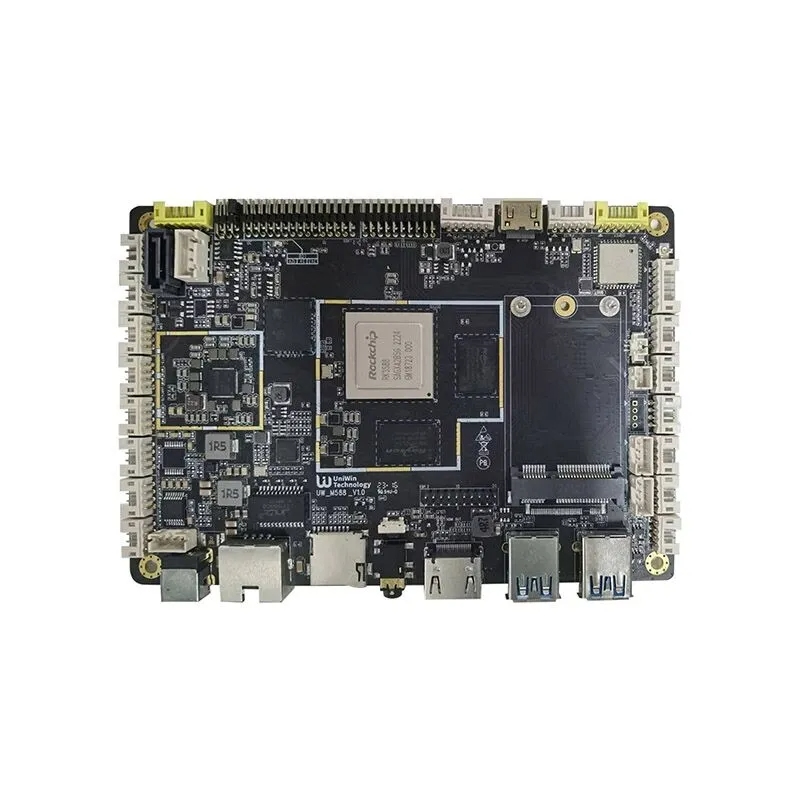
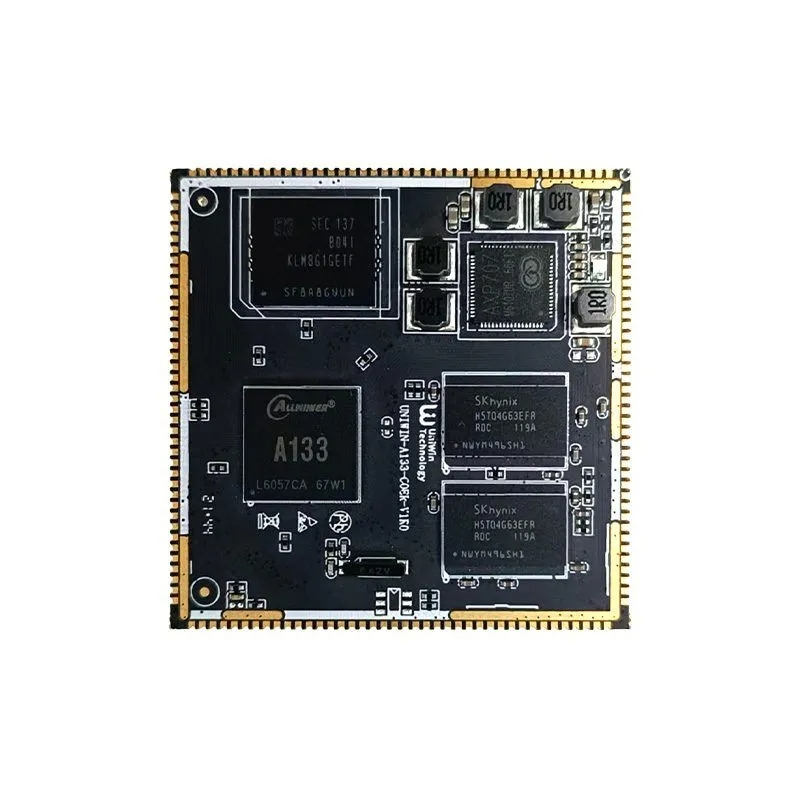
Correct identification of your motherboard model is necessary for correct installation. Uniwin-Global’s product line has various models such as Allwinner A133, Rockchip RK3588, EEASYTECH SH518, and Rockchip RK3568. All these models require an individual set of requirements for installing and connection layout that must be mastered before initiating the installation.
Installing the CPU and RAM
Insert the CPU into the Socket
CPU installation should be handled carefully. In Uniwin-Global motherboards like RK3588, with RK3588 (Cortex-A76x4+ Cortex-A55 x4) 6-core, with 6T computing performance, and main frequency up to 2.4GHz, meeting performance and AI algorithm requirements, proper socket alignment is crucial. Never force the CPU in – it will slide in smoothly when aligned.
Use Thermal Paste if Needed
Certain motherboards require thermal paste between the heat sink and CPU. Use a small rice-grain-sized portion to allow for heat transfer without overflowing.
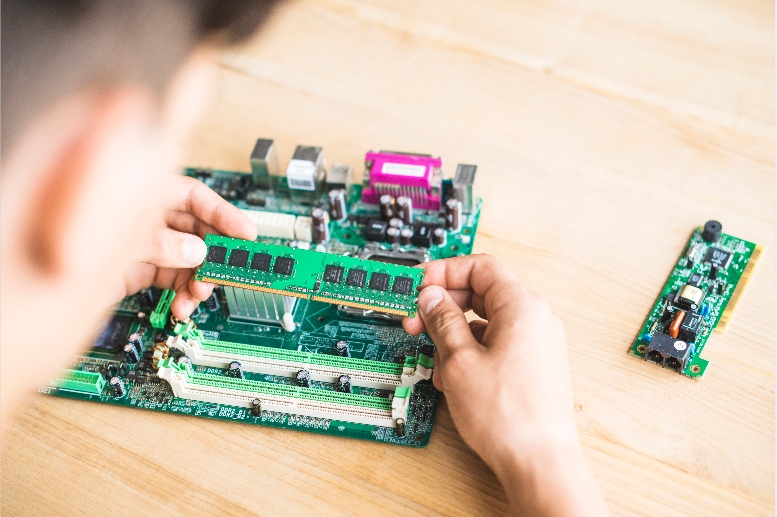
Install RAM Modules Properly
Uniwin-Global motherboards require caution in memory installation in terms of slot configuration. The A133 model supports single-channel or dual-channel LVDS dot screen or 1-channel MIPI screen, implying that it has advanced memory handling. Install RAM modules firmly into position.
Mounting the Motherboard to the Case
Align the Uniwin-Global Motherboard with Standoffs
Standoff alignment prevents short circuits from happening and keeps the mounting secure. Make sure all standoffs correspond to mounting holes on your motherboard in the first place.
Secure the Motherboard with Screws
Tighten screws equally and don’t over-tighten, as it might damage the motherboard or the case. Start with corner screws and move around the perimeter.
Connect Rear I/O Shield
Install the I/O shield within the case opening before the motherboard is installed. The shield protects rear connectors and provides electromagnetic interference shielding.
Power Supply and Cable Connection
Connect 24-Pin and 8-Pin Power Connectors
Power connections are critical for system operation. The main 24-pin ATX connector powers the motherboard, and the 8-pin CPU connector powers the CPU. Ensure that connections are well seated and secure.
Connect Front Panel Connectors
Front panel connectors include a reset button, power button, and LEDs. These small connectors require so much attention when it comes to how the positive and negative pins are oriented according to your motherboard manual.
Connect SATA and Other Data Cables
Data interfaces enable data communication between storage devices and the motherboard. For Uniwin-Global motherboards supporting high-performance connectivity, such as the M588 supporting LVDS/MIPI/eDP/HDMI/Ethernet/WIFI&BT, HDMI-IN input support, and dual-channel EDP screen output support, make sure all cables required for data are properly secured.
Installing Expansion Cards and Storage Devices
Insert GPU or Other PCIe Cards
PCIe card installation entails the identification of appropriate slots and secure mounting. The RK3588 motherboard offers abundant peripheral interfaces, 9 USB ports, and 7 serial ports (dual programmable as RS232 and RS-485), to support rich expansion capability.
Mounting SSDs or HDDs to Drive Bays
Storage device mounting entails both physical mounting and cable connection. Mount the drives securely to prevent vibration and have stable data transfer.
Final Checks Before Powering On
Verify All Cable Connections
Before powering up, check all the connections systematically. Check power cables, data cables, and front panel cables. Loose connections could prevent booting or cause system instability.
Check for No Loose Screws or Obstructions
Check the inside of the case for loose screws or components that could cause short circuits. Sweep out any debris that accumulated during setup.
BIOS Setup and System Boot
Boot to BIOS and Check Hardware Detection
First boot, enter BIOS to verify hardware detection. Uniwin-Global motherboards like A133 provide a stable Android system, providing rich custom APIs to assist customer application development, ensuring a stable system run.
Set Boot Priority and Save Settings
Set the appropriate boot priority and set the fundamental system setup. Save settings before exiting BIOS to ensure settings will be saved.
FAQ
Q: Why are Uniwin-Global motherboards suitable for novices?
A: All materials guaranteed original and sealed, uniform and strict selection standard from PCB to components. Defect rate < 1%, motherboard warranty period 1 year.
Q: Is support available after installation?
A: We have a strong technical support team. Hence, customer issues will be responded to within 2 hours and resolved within a maximum of 48 hours.
Q: Are Uniwin-Global motherboards compatible with multiple operating systems?
A: Yes, the M588 model supports various operating systems (Android/Linux/Kylin/Tongxin UOS/Hongmeng, etc.) with the flexibility for diverse applications.
Q: What are the quality assurance processes?
A: We follow International Product Certification and Compliance and Safety Certification.